Social Media

link link Instagram Bitesizemegan

Tuesday, February 16, 2016

Starting Your Seedlings Indoors.

Growing your own seeds indoors is a great way to save some money each year instead of purchasing your plants from a store or nursery. It also allows you to try different varieties that you may not be able to purchase as transplants.

I usually start my tomatoes about 8 weeks before the last frost, peppers 8-10 weeks and cucumbers and zucchini about 4 weeks (they grow fast). Not sure when the day of your last frost is? You can always check here.


There are many things you can start your seeds in, but this is what I normally use. Plastic cups work well also, just make sure you poke some wholes in the bottom for drainage. You will also need some kind of seed starting mix. You can usually get a good sized bag for around $5-$6. Moisten the seed starting mix with some water, but don't get it too wet to the point you have mud. This will give the seeds a good start to their germination. Your seed packet should tell you how deep to sow your seeds.

 When starting seedlings indoors you really need some type of artificial light. If your seedlings don't get sufficient light they can get "leggy" and weak. This is the grow light system that I personally own: Hydrofarm Jumpstart Grow Light. This is great for the beginner that isn't growing a large amount of plants. This year year we are building a larger grow light system which I will share in another post.

Once the seedlings have started to sprout you want to take the cover off. Too much humidity can cause fungus and bacteria. At this point you want to make sure you keep the light about 2 - 4 inches away from the plants. Because plants indoors aren't getting natural sun, you will want to make sure you plants are getting about 16 hours of light. A lot of people put their lights on timers so they don't have to remember to turn them on and off all the time. 

My tomato seedlings should be coming up any day now, soon hopefully followed by the peppers and onions. 


Friday, October 2, 2015

Reviewsio!


Do you have an amazon account? Do you want to receive cheap or free products? Then you need to sign up for Reviewsio!

Reviewso is a website that allows you to receive free or very discounted products? Whats the catch? In return you agree to leave a review of the product on amazon. Easy! Not only are you getting products to try out, you are earning points on the website towards amazon gift cards.

Click here to sign up! 

Thursday, August 13, 2015

Don't be a dick.

Imagine how much better the world would be if we all followed this rule?


Sunday, March 15, 2015

Starting My Tomato Seedlings Indoors

Growing your own seeds indoors is a great way to save some money each year instead of purchasing your plants from a store or nursery.

When starting seedlings indoors you really need some type of artificial light. If your seedlings don't get sufficient light they can get "leggy" and weak. This is the grow light system that I personally own: Hydrofarm Jumpstart Grow Light.


This year I started my seedlings in Jiffy peat pellets, but really you can start your seedlings in many things from seed trays like this or even plastic cups. 


Once the seedlings have started to sprout you want to take the cover off. Too much humidity can cause fungus and bacteria. At this point you want to make sure you keep the light about 2 - 4 inches away from the plants. Because plants indoors aren't getting natural sun, you will want to make sure you plants are getting about 16 hours of light. A lot of people put their lights on timers so they don't have to remember to turn them on and off all the time. 


Today my seedlings are at 3 weeks and 2 days of growth. When they were about 3 inches tall I transplanted them to some plastic cups that I got for cheap.  Unfortunately this all I have room for with this light system. Next year's project will definitely be getting more lights to do peppers and start my cucumbers indoors. 

I hope to get these in the ground sometime after April 1st. 

Friday, July 11, 2014

Sweet Relish Canning Recipe

Next up I wanted to make some sweet relish, because maybe there is such a thing as too many dill pickles? I know, hard to imagine. Since I had no idea how to make sweet relish I used this recipe over at Old World Garden Farms. If you have some time I highly suggest checking out other parts of their site.


Draining the cucumbers.

The reason I liked this recipe was that it uses a lot less sugar than most recipes that I found. I kind of liked the fact that I wasn't using 2-3 cups of sugar! I cut my cucumbers into a little bit larger chunks, but that's all a matter of personal preference.


Wednesday, July 9, 2014

Canning Dill Pickles

I love dill pickles, so one of my goals this year was to focus on growing tons of cucumbers. A ton is what I got. I thought I'd share the recipe Im using to make my pickles.


Garlic Dill Pickles
(makes 4 pints)

2 cups distilled white vinegar
2 cups water
2 tbs. canning salt
1 tsp dill seed per jar
1/2 tsp mustard seed per jar
1 clove garlic per jar
1/2 tsp red pepper flakes (optional)

1. Start bringing large pot of water (for water bath canning) to a boil.

2. Cut pickles however you want or keep whole. Make sure to cut off the blossom end of the pickles. (The blossom ends contain enzymes that can make your pickles softer.)

3. Place dill seed, mustard seed and garlic into each jar and pack pickles into the jars.

4. Bring water and vinegar to a boil. Once boiled pour into jars leaving about a 1/2 inch headspace. Remove any air bubbles around the pickles. Wipe off rims of jars and hand tighten lids. 

5. Process in your boiling water bath for 10 minutes for pints. Remove from water and place on towel on the counter. Let them cool completely. Once cooled check the seal on top of the jar. If it "pops" that means it didn't seal and you should go ahead and put them in your fridge to eat within a week or so (or less if they even last that long)

Next up is some sweet relish and some chicken stock made in the crockpot to then be canned in the pressure cooker. Those posts to follow!


Monday, June 30, 2014

Influenster #TLCVoxBox

Influenster.com is a website you can join to receive boxes that contain products for you to try out, in return you agree to share your opinions. The more you share, the more stuff you'll get! Ive been a member for about a year now and this is the third box I have received. 


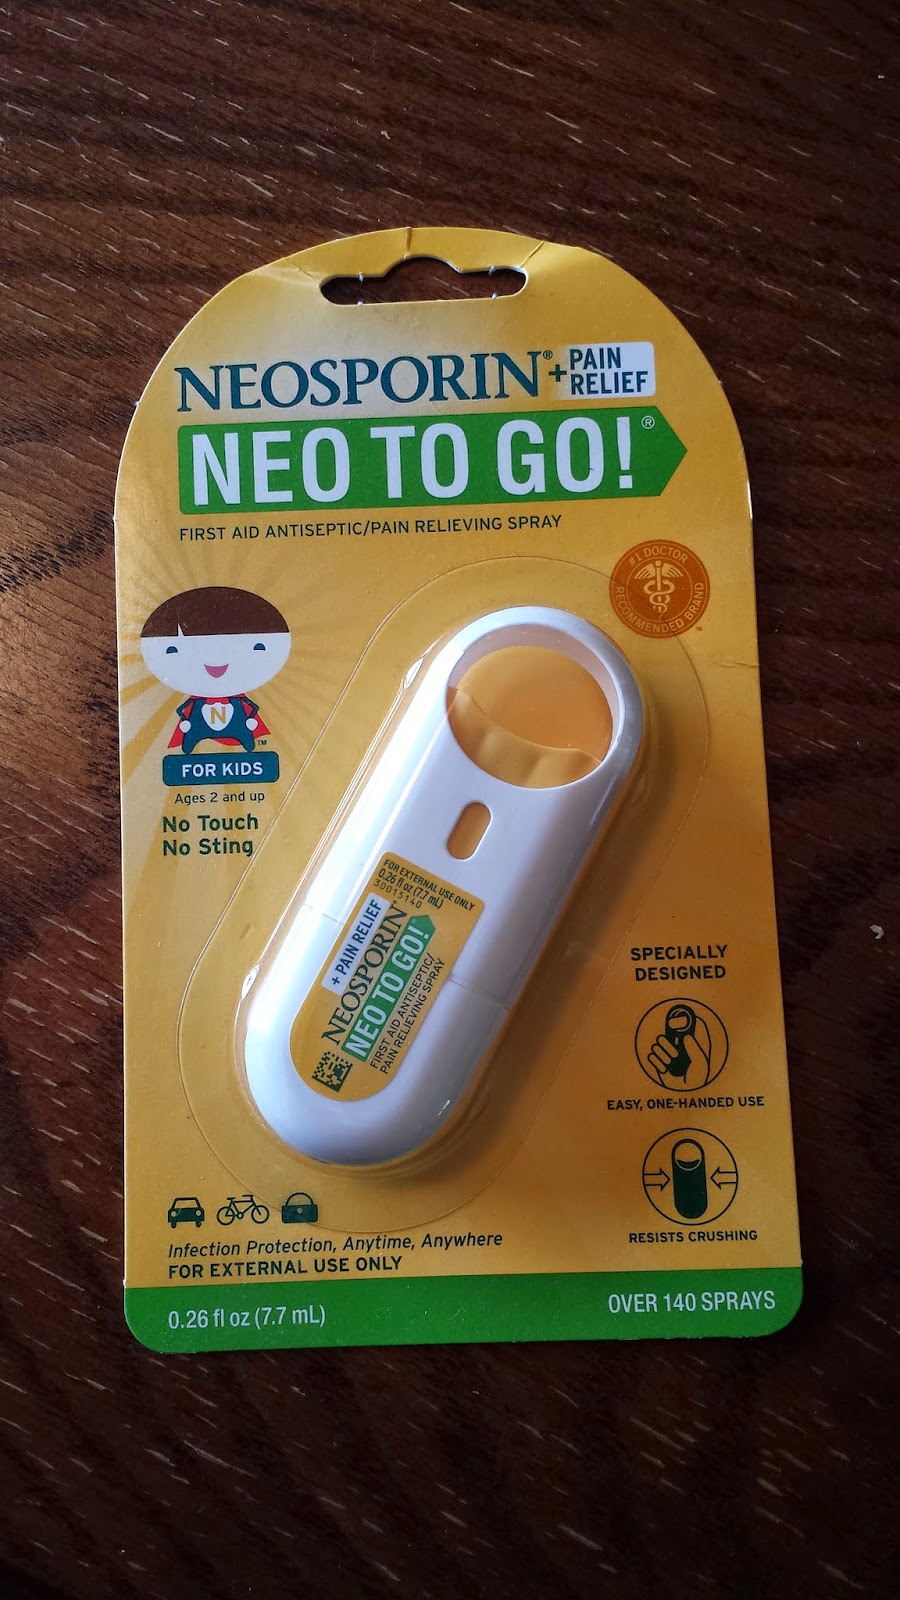
I received the T.L.C. Voxbox! This box contains items for the mom on the go. Inside is Neosporin Neo to Go, Puff Soft Pack, Ivory Soap, Breyers Gelato Indulgences, Shell Fuel Rewards and Avon Anew!


1. Neosporin to Go: Anyone that knows me, and my boys, know they are far from the most graceful of kids. I mean come on, we've had urgent care trips for staples to the head and our fair share of scraped knees. Basically, a product like this is meant for us. 


2. Ivory Soap: I love that Ivory gives us an option for soap that easy available and free of heavy dyes and perfumes. I also had no idea how many different things you can do with ivory soap. 


3. Puffs to Go: I can probably think of a million uses for tissues as a mom. These small packs make it easy to stuff in my purse and have handy on the go. Plus the come in some pretty cute designs. I can see this being even better to have in the winter when you have a kid with a constant stream from their nose. 

4. Shell Rewards: I love the concept of the Shell Rewards program, I just wish the nearest Shell station was a little less "out of the way". But, its not too far that I can't utilize this at all. Have a Shell gas station? Sign up for their reward program here and save some money off your gas. 


5. Avon Anew: Avon Anew is a new product from Avon that will help diminish the look of fine lines. I like that this product helps soften lines without being too heavy and doesn't make you feel greasy. You can currently get 15% off your Avon skincare purchase of $50 or more over at avon.com if you use the code ANEW15.


6. Breyers Gelato Indulgences: How much do I really need to say on this one? Strawberry Cheesecake! 

If you're not already signed up with influenster, you should be! Go sign up here!


Sunday, January 19, 2014

Canning Tomatoes!

Last year I planted 14 tomato plants. So basically I had a lot way too many tomatoes.


A lot as in this is only a small part of what I had. So it was time to break out the canner and start canning some sauce!


First go ahead and cut out the stems of the tomatoes and questionable bits. You don't have to, but I usually cut an X into the bottom to make the next step a little easier.


Get some water bowling, just enough to cover the tomatoes. Boil a few at a time for about 30-45 seconds. You'll start to see the skin start to peel.


Throw those suckers into bowl of ice water. This will stop the cooking process and help the skins peel off easier. From here you just start getting all those skins off. 


This next step is really personal preference. You can leave the tomatoes whole, you can cube them up or you can do like I did and make a sauce. A very simple one at that. 

Start by cutting the tomatoes into 4ths and removing much of the liquid. This will help reduce your cooking time. Set your heat to medium high and bring to a boil. After that set to simmer and cook until desired thickness. Mine was reduced about half. 


Get that canner boiling! Ive got about 3 inches of water in there. While you're waiting for that to boil, get a smaller pan and start boiling your lids. 


Confusing picture time. Apparently I took pictures of tomato chunks I did the second time around instead of the sauce. But hey, you can get the idea. For pint jars add 1 tbs of lemon juice. For quarts go ahead and add 2 tbs. Why lemon juice? Tomatoes are a very low acidic food and if the acidity is not brought up by the highly acidic lemon juice, it can lead to botulism. And that's not fun. 

If your doing whole tomatoes or chunks pack the tomatoes in. You can fill the empty space with hot water or hot tomato juice. I used tomato juice as it just kind of looks better. But either is fine. Fill to about 1/2 inch head space from the top of the jar. Wipe the tops of the jars to remove any moisture and place on your lids and bands. Tighten the bands but be sure not not overly tighten them.


Now for the canner! The first time I used this thing I was totally paranoid I was going to blow up my house with it. I think I read the instructions over again about 20 times to make sure I was doing it correctly. But don't really, they're not really that scary. Yours may work differently so do refer to your manual. 


Place the lid on and after about 10 minutes your going to see steam coming out the top. This means the canner is filling up with steam. Once you see the steam coming out place the weight on. In a few minutes the weight should start to wiggle. Picture me staring intently at the canner. Once its starts wiggling set your timer to 10 minutes.

10 minutes is up! Turn off the heat and let the canner cool down on its own. Apparently if you tried to open it now this is where it might blow up your house. (I kid, but seriously let it cool down on its own and don't try to open it.) Once it's cooled remove the jars and let them sit over night to cool down. When you touch the top of the jars they shouldn't "pop". If they do it means they didn't seal correctly. If that happens just put it in your fridge to use later (or freeze it!).


Monday, May 20, 2013

Let The Bodies Hit The Floor.

So about weekly Josh and I argue the lyrics to this song:


Totally appropriate song for a 3 year old right?

I'm assuming he heard it in one of the bazillion YouTube videos he watches. Usually the conversation goes something like this:

Joshua: "Let the bodies hit the fuh!"

Me: "No, its let the bodies hit the floor!"

Joshua "No, its let the bodies hit the fuh!"

Me: "Whats a fuh!?"

*Joshua just stares at me*

Me: "Its floor, trust me dude."

Joshua: "No, floors are for vacuuming."

Me: "You win."

When he's not listening to age inappropriate music, he's watching videos from this guy, who I have to assume is completely single.